Creating a Virtual Network for AVD
VNet and on-premises connectivity are important prerequisites for Azure Virtual Desktop. It is important to set up VNet correctly with the required subnet, DNS settings, and peering with a hub virtual network for on-premises connectivity (or hub shared service connectivity) so that users can use their domain credentials to log in to AVD and access their on-premises applications/services.
Follow these steps to create a VNet instance for AVD:
\ 1.\ Log in to the Azure portal and select the correct directory and subscription where you want to create the AVD host pool and desktops. Make sure you have correct permissions (contributor or owner) to create network resources. See Figure 4-2.

Figure 4-2. Azure subscription selection
\ 2.\ Search for virtual network in the top search bar. See Figure 4-3.

Figure 4-3. Azure virtual network search
\ 3.\ Click Create to create a new virtual network. See Figure 4-4.

Figure 4-4. Azure virtual network creation
\ 4.\ Select the correct subscription and resource group names from the drop-down where you want to create the AVD desktops. If the resource group does not exist, then you can create a new resource group by clicking the Create New option. See Figure 4-5.
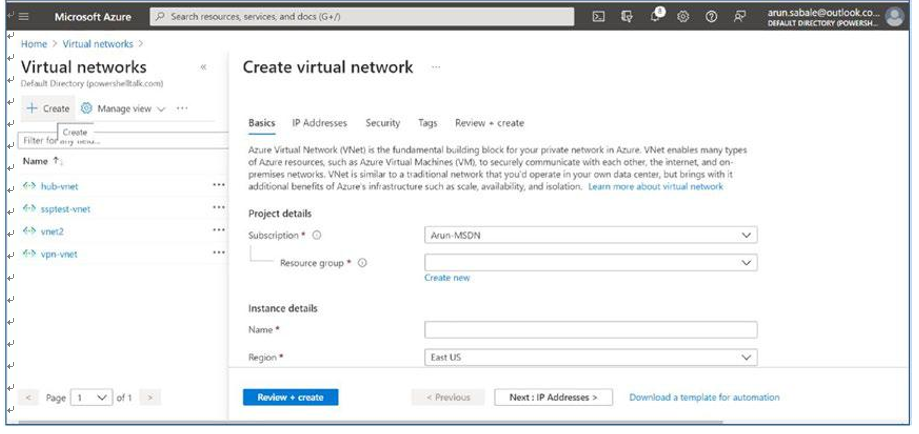
Figure 4-5. Azure virtual network creation page
\ 5.\ Additionally, provide the virtual network name as per your organization’s naming standard and select the correct region (the same as AVD desktops). Click the Next button once, and enter all the information. See Figure 4-6.
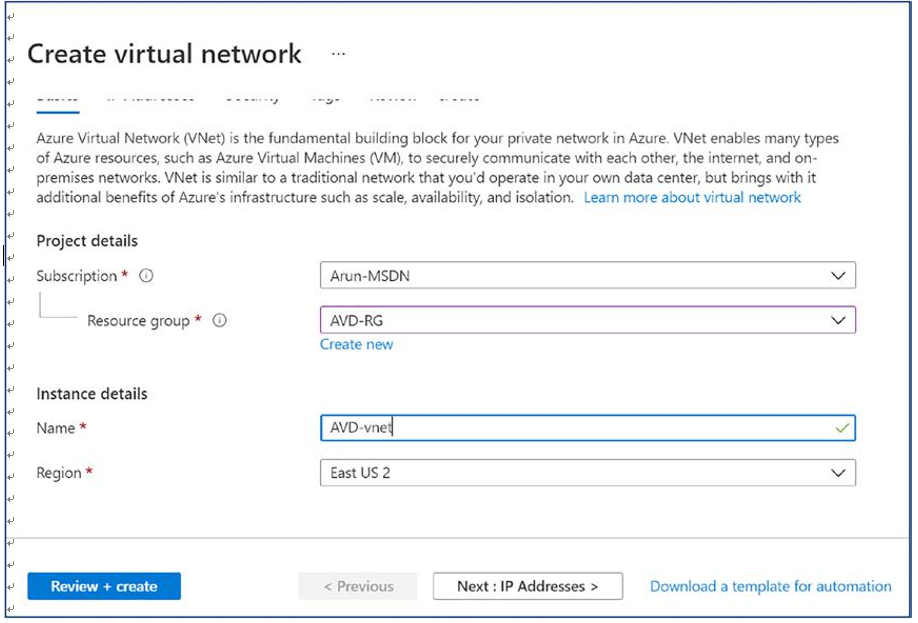
Figure 4-6. Azure virtual network creation, Basic tab
\ 6.\ Provide the IP address space/range for VNet on the IP Addresses tab. You must coordinate with the network team to get the correct IP address range for AVD VNet that does not conflict with an existing VNet or on-premises IP address range. See Figure 4-7.
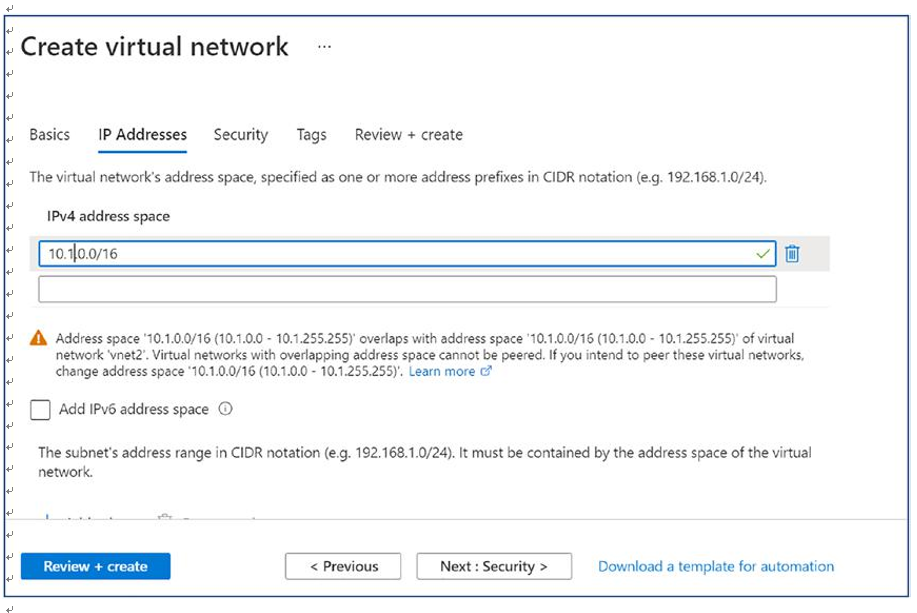
Figure 4-7. Azure virtual network creation, IP Addresses tab
\ 7.\ Additionally, create an appropriate subnet on the same IP Addresses tab. You can click the “Add subnet” option to add additional subnets. You must consider the number of session hosts/VMs you are planning to create under each subnet plus some buffer IP addresses for future use and create the subnet accordingly. Create the subnet, remembering that each host pool needs to be placed in different subnets if they belong to different business units and don’t want to share any user data. See Figure 4-8.

Figure 4-8. Azure virtual network creation, add subnet
\ 8.\ You will get a subnet pop-up to enter additional subnet information like the name and IP address range. Make sure you are entering the subnet name as per your organization’s naming standards. Click the Add button to add the subnet. See Figure 4-9.

Figure 4-9. Azure virtual network creation, adding a subnet detail
\ 9.\ Once you have entered all the IP address information, then click Next to go to the Security tab and verify whether you want to change anything as per your organization standards, or click Next to go to Tags. Make sure you are adding tags as per your organization’s standards and click Next. See Figure 4-10.
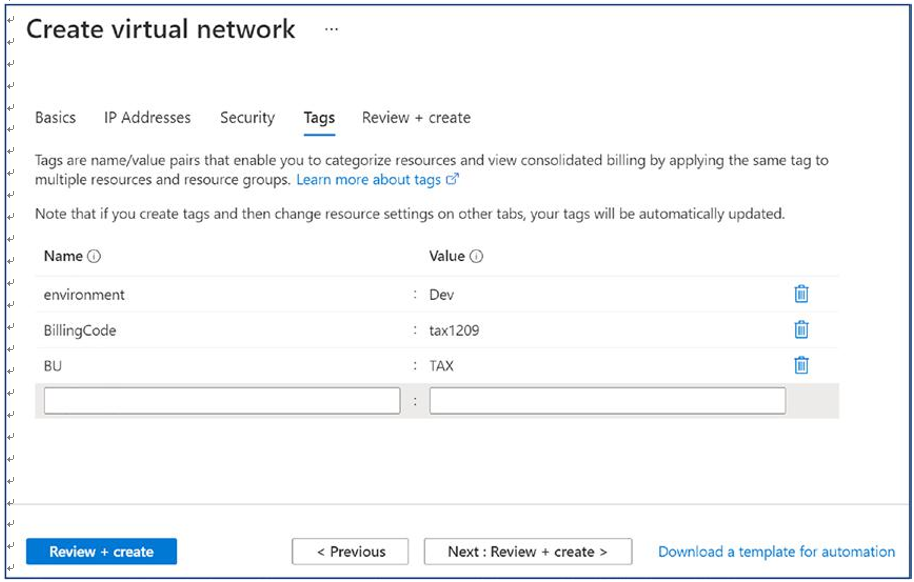
Figure 4-10. Azure virtual network creation, Tags tab
\ 10.\ Finally, click “Review + create” and then click Create once the validation is completed. See Figure 4-11.
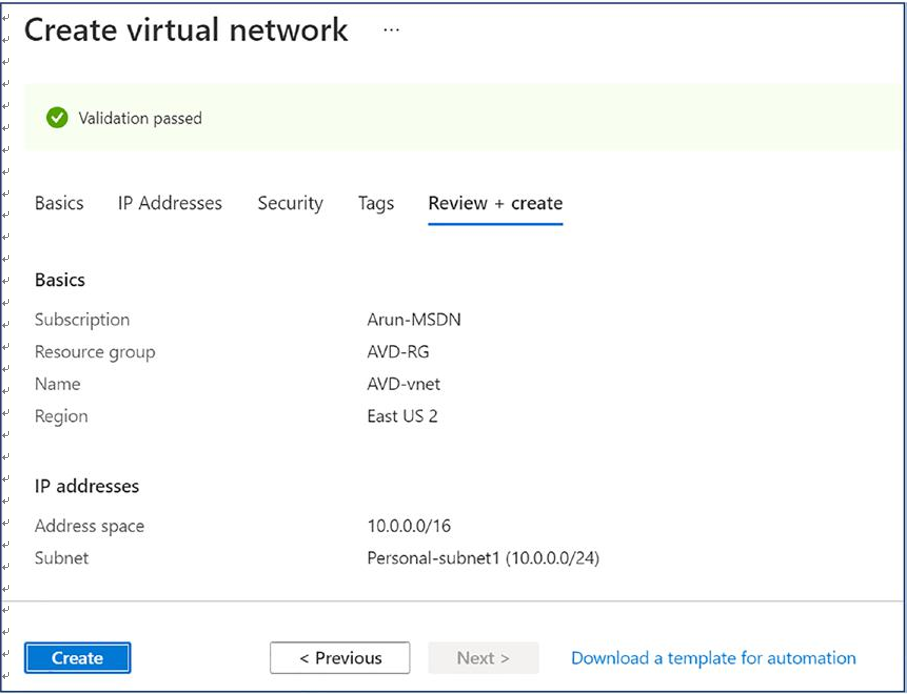
Figure 4-11. Azure virtual network creation, creating and reviewing
\ 11.\ You will be able to see deployment progress on the same page, and you can go to the resource once the deployment is completed. See Figure 4-12.
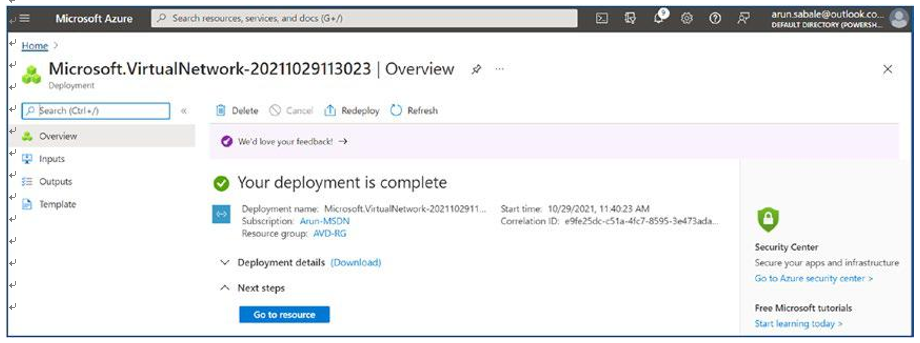
Figure 4-12. Azure virtual network creation, deployment status
\ 12.\ You can verify the VNet details on the Overview page. See Figure 4-13.
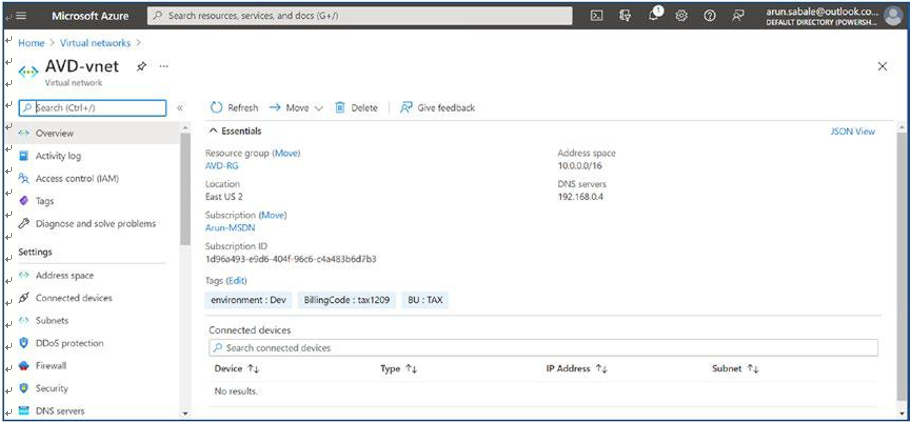
Figure 4-13. Azure virtual network, AVD VNet details
\ 13.\ If you still want to add subnets, then you can go to the Subnet option in the left pane and click to add a subnet. See Figure 4-14.
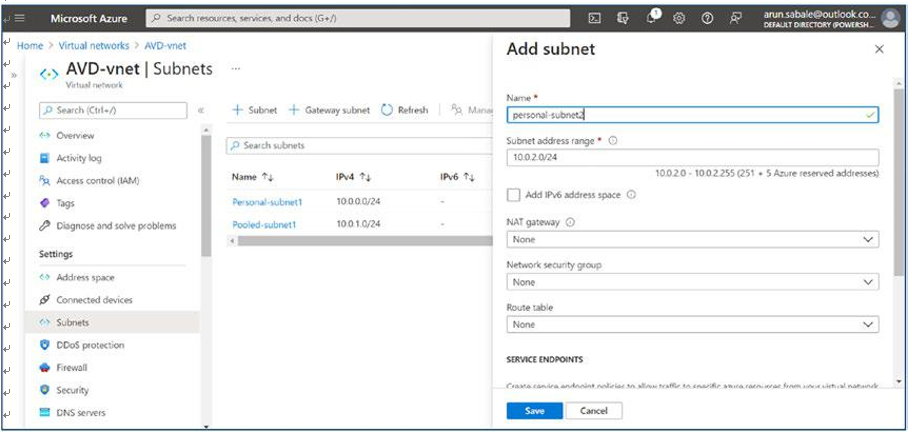
Figure 4-14. AVD virtual network, adding a subnet
\ 14.\ Once the subnet and VNet are ready, then the next step is to create a network security group (NSG), peering to a hub virtual network, and DNS settings. Create the NSG and click the Create option to create a new network security group. See Figure 4-15.

Figure 4-15. AVD virtual network, creating a NSG
\ 15.\ Select the correct subscription and resource group for the network security group (the same as AVD VNet). Add the NSG name and select the correct region the same way as you did for the VNet and AVD desktops. See Figure 4-16.
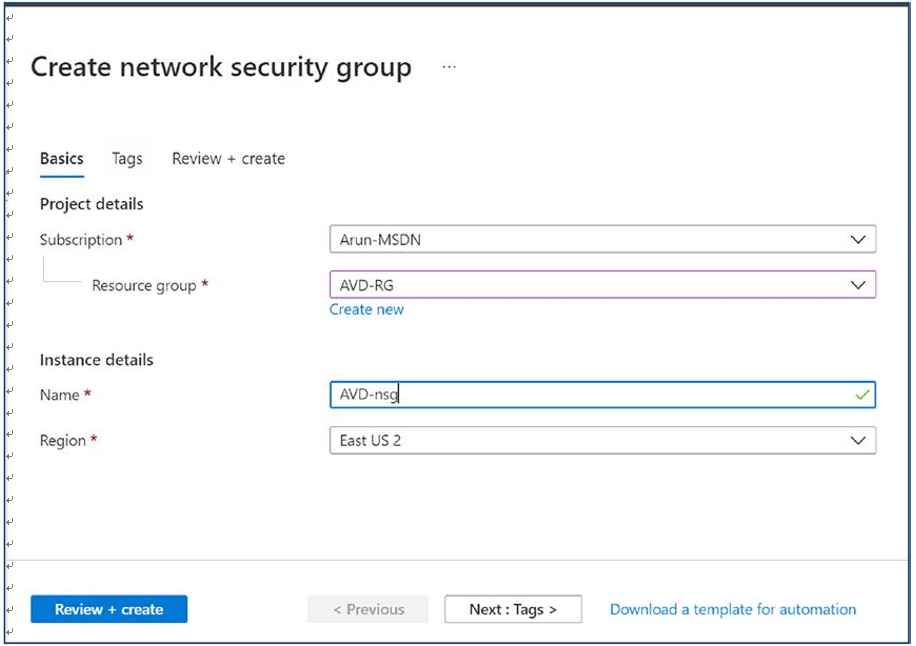
Figure 4-16. AVD NSG creation
\ 16.\ You will see the deployment status on the same page. Wait for the deployment to complete and then click “Go to resource.” See Figure 4-17.
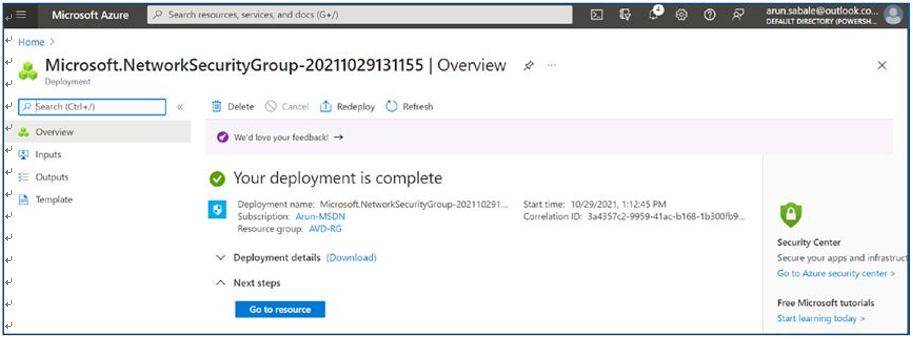
Figure 4-17. A AVD NSG creation, deployment status
\ 17.\ The NSG default rules will be visible on the Overview page. See Figure 4-18.
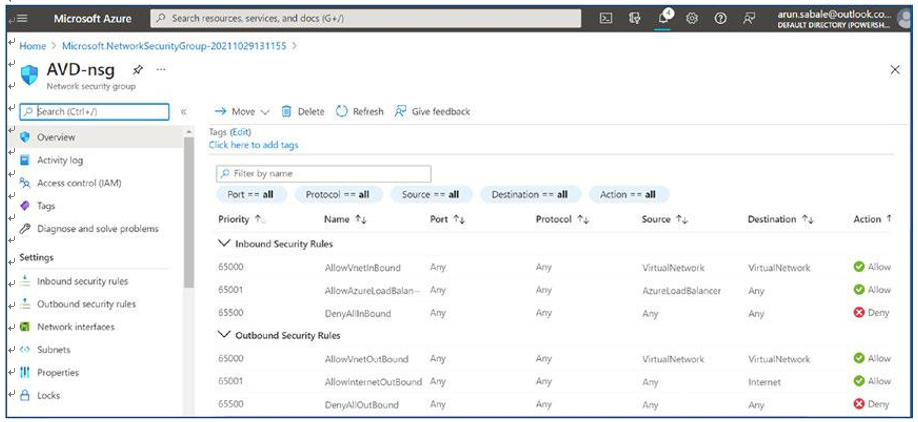
Figure 4-18. AVD NSG, Overview page
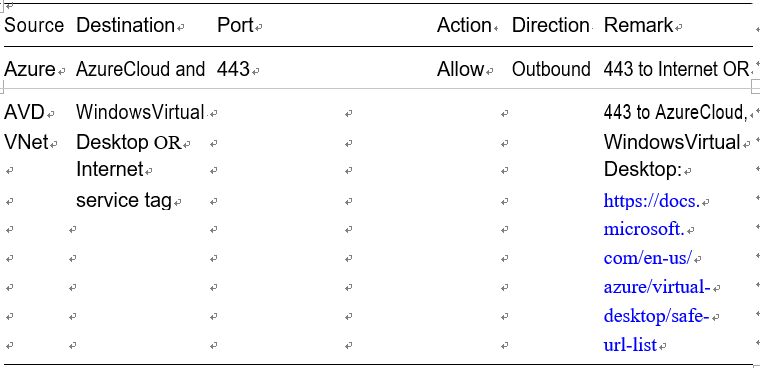
\ 18.\ Make sure to add the AVD-specific IP/port in the outbound rules. The following are the recommended/required IP addresses/ ports for AVD. AVD does not require any inbound connection but definitely needs KMS, metadata, health monitoring IP addresses/ ports, and a few Azure service tags in case you don’t want Internet access on the VM. Refer to Table 4-1 for all AVD-specific port and IP details. See Figure 4-19.
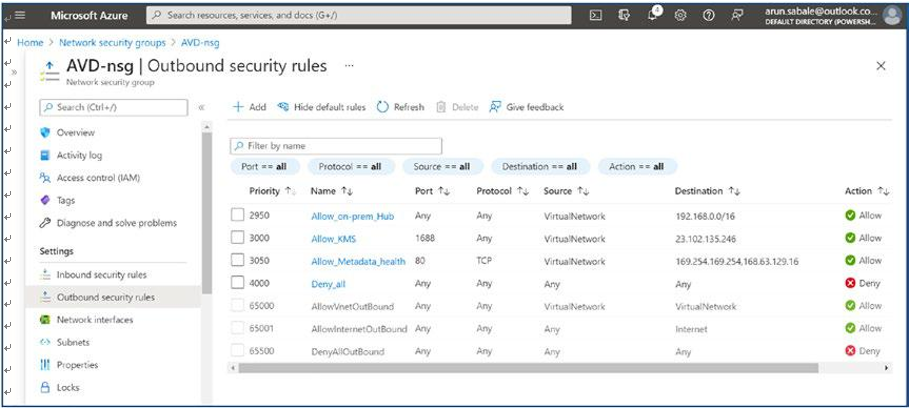
Figure 4-19. AVD NSG, Outbound security rules
Table 4-1. AVD NSG: Outbound Security Rules Requirement
Table 4-1. (continued)
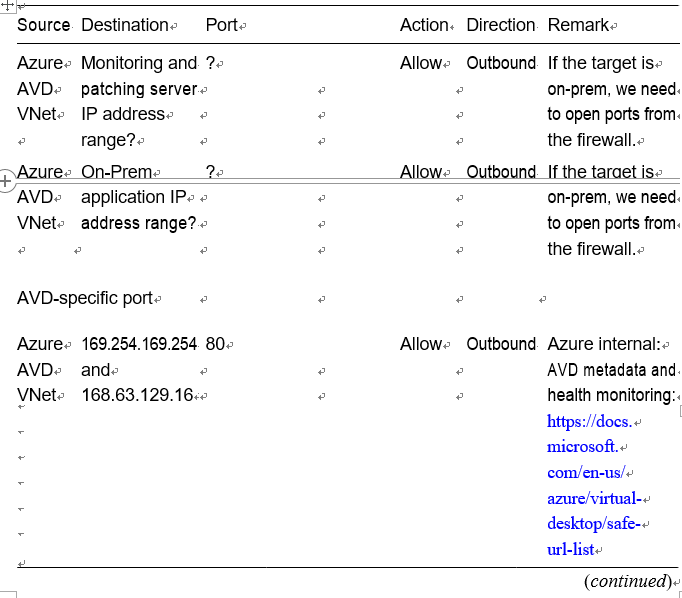
Table 4-1. (continued)
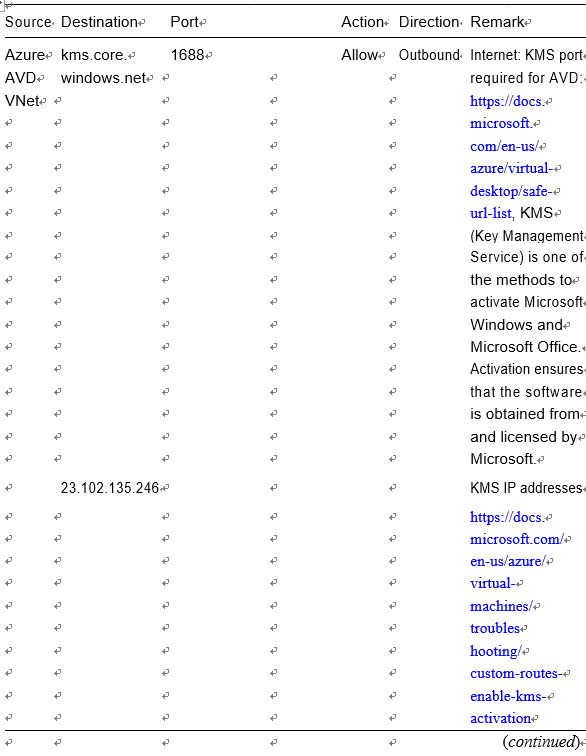
Table 4-1. (continued)
