\ 19.\ Once an NSG is updated with the correct rules, then you have to attach it to subnets so that the rules will take effect. Go back to the AVD virtual network you created at the start and go to the subnet option from the left pane. Now click the subnet name and attach the NSG from the right-side pane. See Figure 4-20.
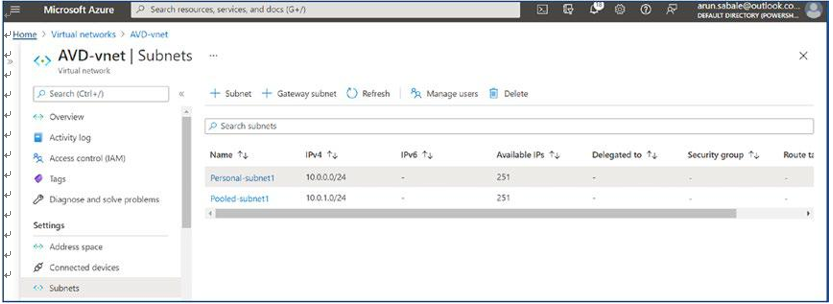
Figure 4-20. AVD NSG assignment
\ 20.\ Select the network security group from the drop-down in the subnet pop-up. See Figure 4-21.
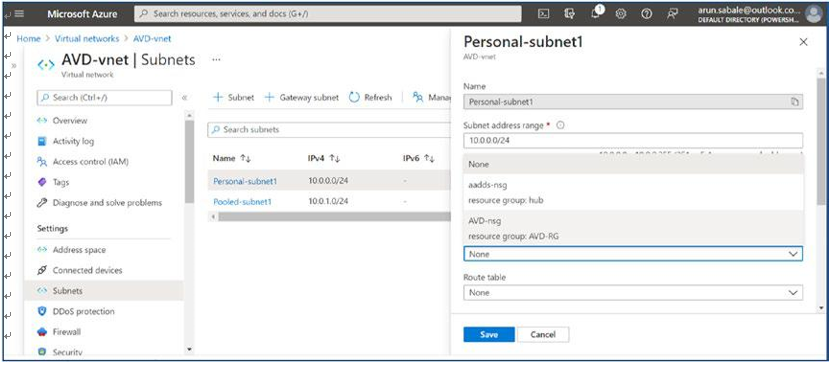
Figure 4-21. AVD NSG assignment on subnet
\ 21.\ Select the correct NSG name and click the Save button. See Figure 4-22.
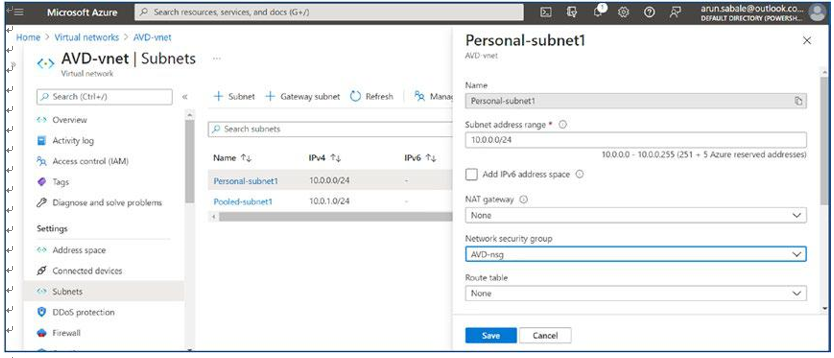
Figure 4-22. AVD NSG assignment page
\ 22.\ You can attach a route table to force-tunnel all traffic to the Azure firewall or third-party firewall in the cloud or on-premises firewall. Select the routing table from the drop-down to attach it to the subnet. See Figure 4-23.
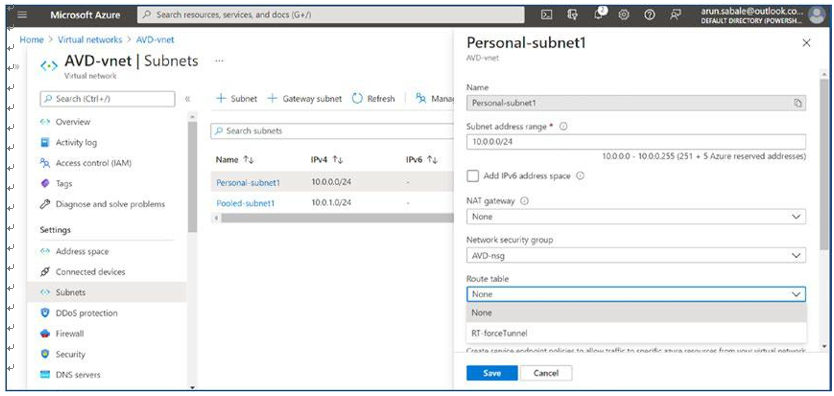
Figure 4-23. AVD NSG assignment page- route table
\ 23.\ Make sure you have the correct port/IP address open on the firewall/NVA when you are force-tunneling all AVD traffic. Additionally, the routing table must have the correct route. Refer to the route table in Figure 4-24.
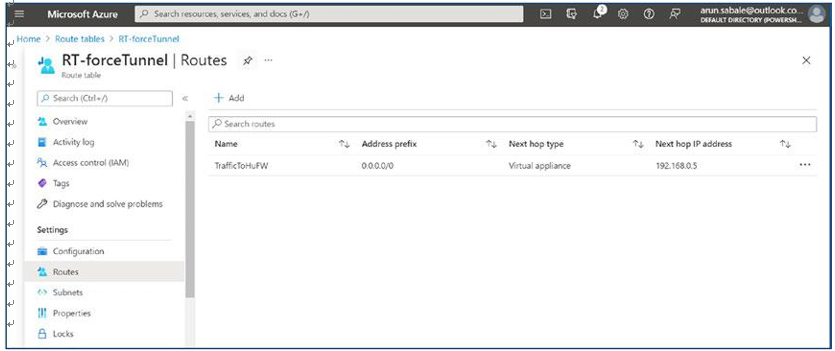
Figure 4-24. AVD routing table to force-tunnel traffic to the firewall
\ 24.\ Once you have updated the NSG and route table, then create peering with the hub VNet so all traffic to on-premises/the other VNet can go through the hub VNet. Go to the hub VNet, click Peering in the left pane, and then click the Add option in the right pane. See Figure 4-25.
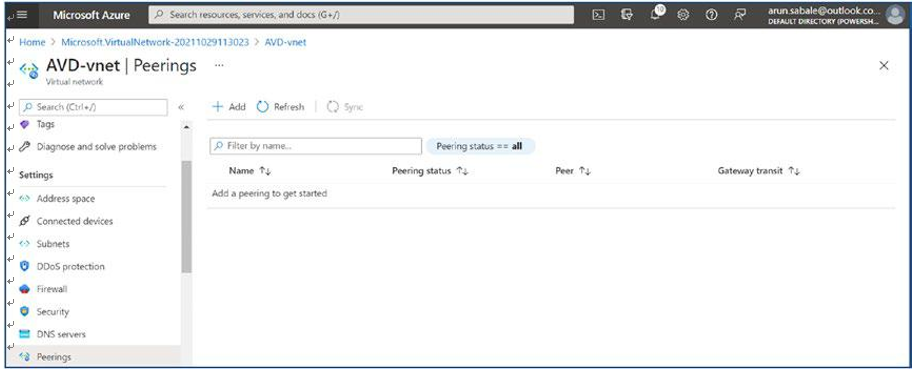
Figure 4-25. AVD virtual network peering to hub virtual network
\ 25.\ Enter the names for peering from the hub to AVD and vice versa. Additionally, select the target virtual network in the drop-down to peer with. Most important, allow all traffic as well as gateway transit so that the gateway will be used for on-premises traffic. The “Gateway transit” option will be available when you have a gateway in the hub for a site-to-site VPN or ExpressRoute. Click the Add button once you select all the options on the peering page. See Figure 4-26.
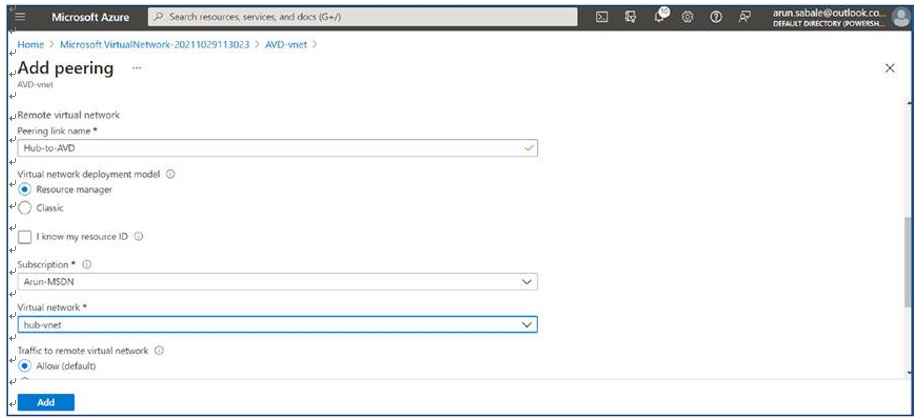
Figure 4-26. AVD virtual network peering to hub vnet, adding peering
\ 26.\ The peering status will be visible on the same page. Wait until the peering status is connected. See Figure 4-27.
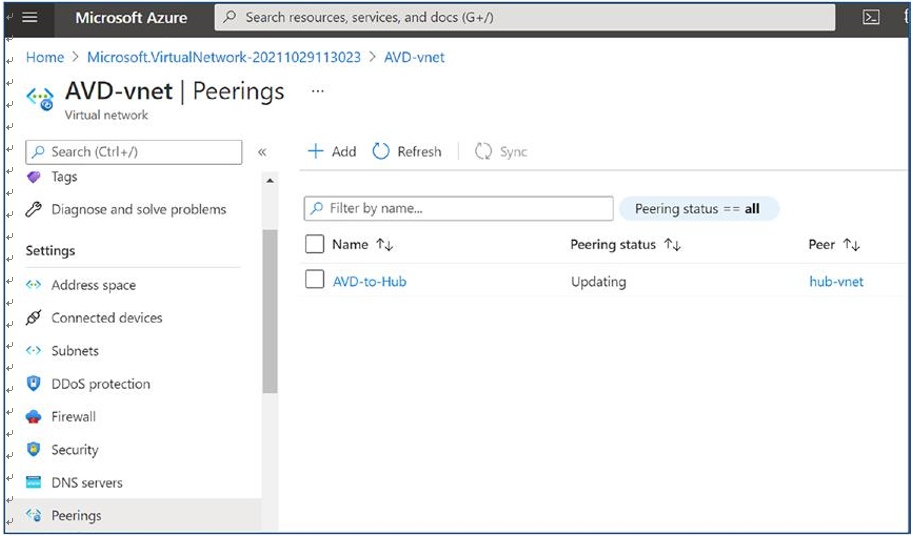
Figure 4-27. AVD virtual network peering to hub vnet, Overview page
\ 27.\ The next step is to update the DNS settings on AVD VNet. Go to AVD VNet and click the DNS Servers option in the left pane. See Figure 4-28.
Figure 4-28. AVD virtual network, DNS server setting
\ 28.\ Select the Custom option in the right pane and enter the DNS server’s IP address. Additionally, you must make sure the DNS port and IP address are open on all firewalls and NSGs so that the session host can reach the DNS server on port 53. Once the IP address is added, then click the Save button to save the configuration. See Figure 4-29.
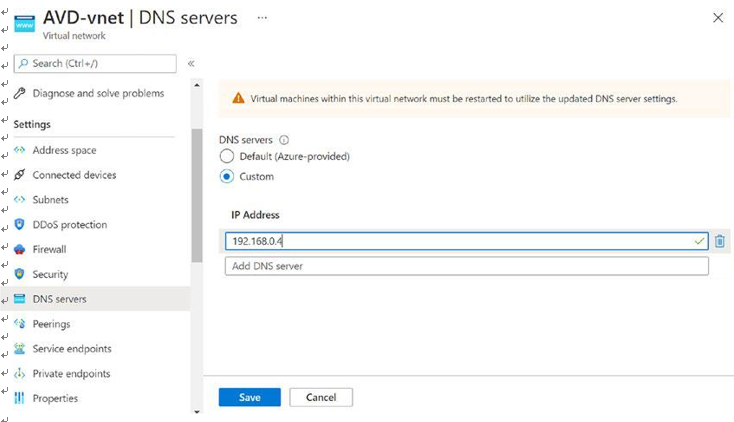
Figure 4-29. AVD virtual network, custom DNS server setting
